This post will explain how to export a range of data from an Excel worksheet to an HTML or web page file using the Save As command and VBA code. This method allows you to create a standalone HTML file that can be opened in any web browser, making it easy to share your data with others.
Export a Range of Data to HTML or Web Page File with Save As Command
If you want to export a range of data from Excel to HTML or web page file, one common method is to use the “Save As” function in Excel.
Here are the steps:
Step1: Select the range of data you want to export to HTML. You can select the cells by clicking and dragging the cursor over the cells.

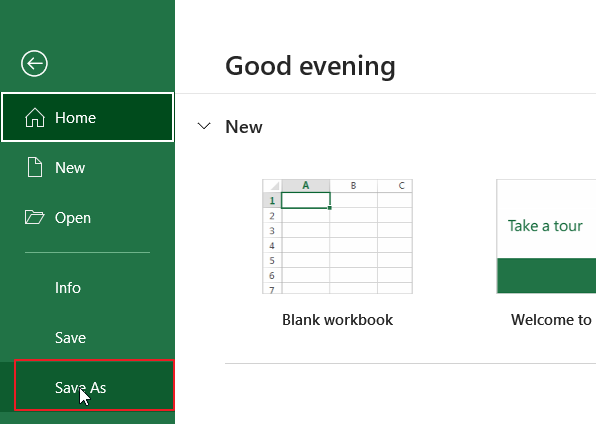
Step2: Click on the “File” tab in the Excel ribbon. Click on “Save As“.
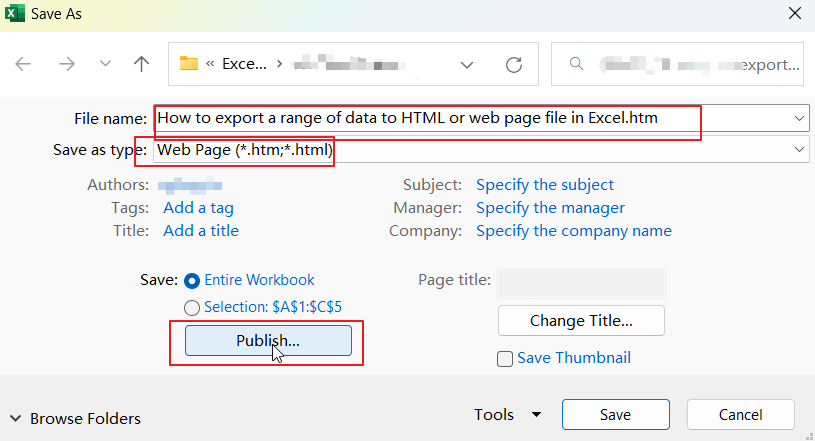
Step3: In the “Save As” dialog box, choose “Web Page” from the file type dropdown menu. Choose the location where you want to save the file and give it a name. Click on “Publish” button.
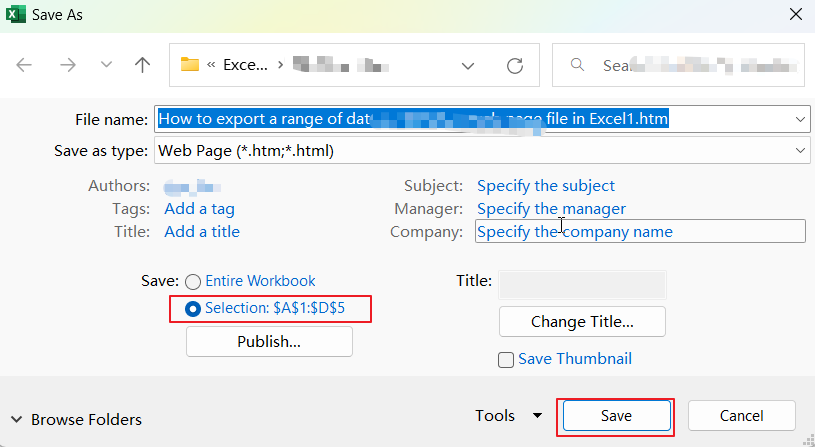
Step4: In the “Publish Options” section, select the “Selection” option to export only the selected range of cells. click Save button.
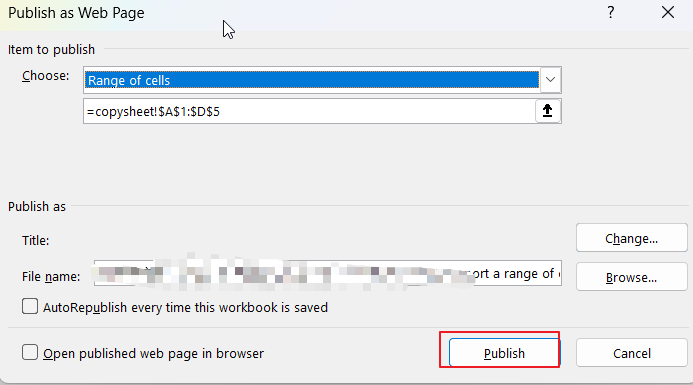
Step5: the Publish as Web Page dialog box will open, Click on the “Publish” button to export the range of data to an HTML file.
Step6: After completing these steps, the selected range of data will be exported to an HTML file that can be opened in a web browser.
Export a Range of Data to HTML or Web Page File with VBA Code
You can also export a range of data to an HTML file with VBA Code in Excel, and you can use the Application.InputBox function to select the range of data to export and prompt the user to select the destination directory and filename. Just do the following steps:
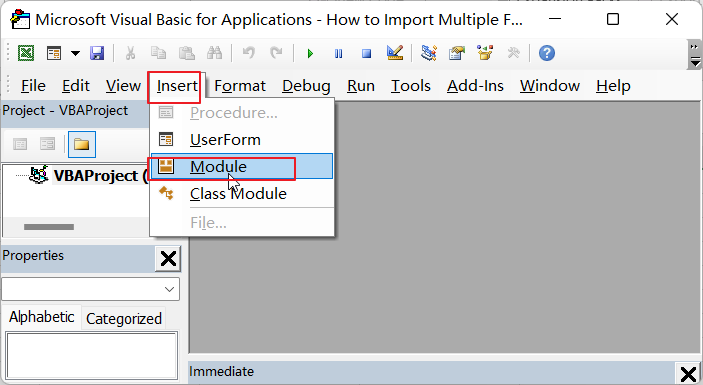
Step1: Press ALT + F11 on your keyboard to open the Visual Basic Editor (VBE).
Step2: In the VBE, click on the Insert menu and select Module. This will create a new module in your VBA project.
Step3: Copy the below VBA code and paste it into the module. Save your VBA project and close the VBE.
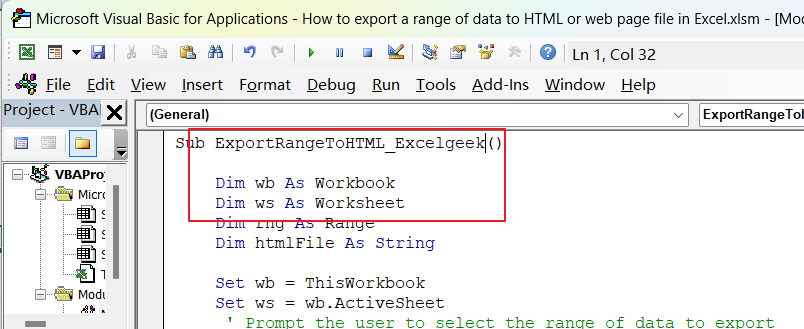
Sub ExportRangeToHTML_Excelgeek()
Dim wb As Workbook
Dim ws As Worksheet
Dim rng As Range
Dim htmlFile As String
Set wb = ThisWorkbook
Set ws = wb.ActiveSheet
' Prompt the user to select the range of data to export
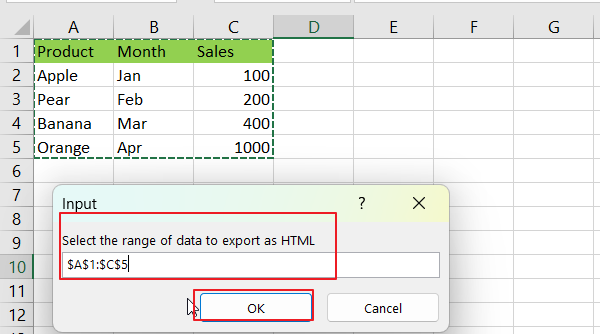
Set rng = Application.InputBox(prompt:="Select the range of data to export as HTML", Type:=8)
' Prompt the user to select the destination directory and filename
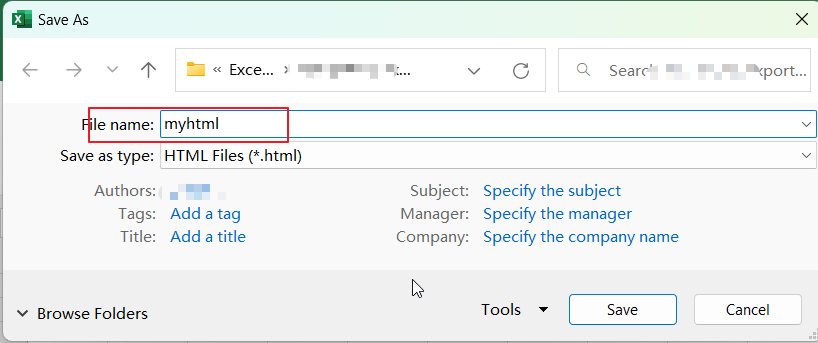
htmlFile = Application.GetSaveAsFilename(fileFilter:="HTML Files (*.html), *.html")
'Create a new workbook with the selected range of data and save it as an HTML file
Dim newWb As Workbook
Set newWb = Workbooks.Add
rng.Copy
newWb.Sheets(1).Range("A1").PasteSpecial xlPasteAll
newWb.SaveAs htmlFile, xlHtml
newWb.Close
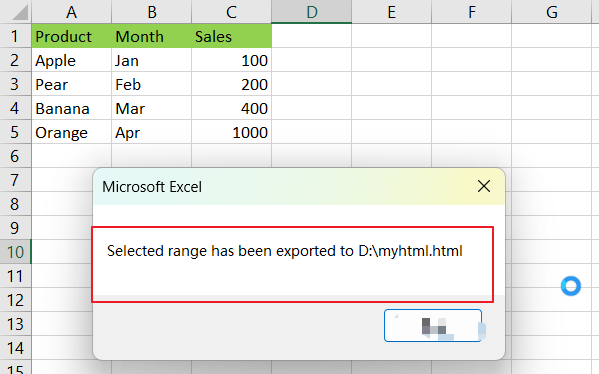
MsgBox "Selected range has been exported to " & htmlFile
End Sub
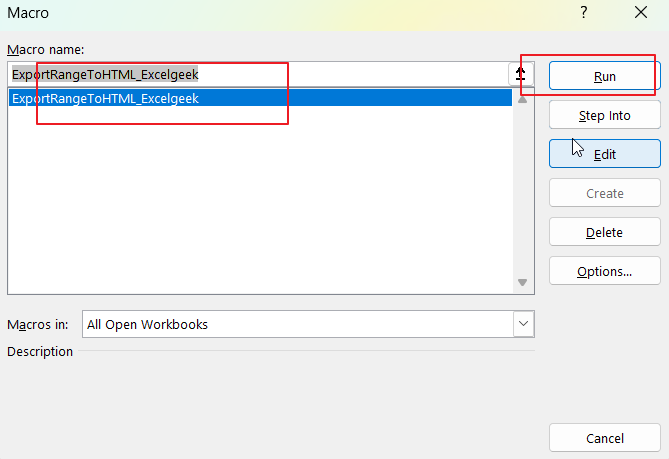
Step4: Press ALT + F8 on your keyboard to open the Macro dialog box. Select the ExportRangeToHTML_Excelgeek macro from the list and click the Run button.
Step5: select the range of data to export in your current worksheet.
Step6: choose a location to save the HTML file.
Step7: Once the macro has completed, a message box will appear indicating that the selected range has been exported to the chosen location.
You should now have an HTML file containing the data from the selected range.
Conclusion
Now you can quickly and easily export a range of data to an HTML file without having to manually copy and paste the data into a web page editor.